Monday, October 31, 2011

Easy Bruschetta

Bruschetta is one of those appetizers which tastes great, looks pretty, but is quick and easy to make. It also does not take very many ingredients so usually  you can whip it up before company comes over without needing to run to the store.

For our version of bruschetta you need:

Ciabatta bread (French bread also works)
4 tomatoes
1 onion
2 bulbs of garlic
2 Tbs olive oil (or there about)
10 leaves of basil
Salt and pepper

Bake the bread in the oven according to the directions (or buy already baked bread). Cut up the onion, garlic and tomatoes in small squares. Cut up the basil into small pieces also. Add all to a  bowl and mix together. Add the oil (it should be quite oily) and add a few shakes of salt and pepper. Some people choose to add a tablespoon or so of balsamic, but we do not do this. We think it tastes great without it and we do not like the brownish color the balsamic turns it.


Once the bread is finished, slice it rather thinly, spoon tomato mixture on top, and serve!

 We recommend using bruschetta as a appetizer before a meal of pesto.

Friday, October 28, 2011

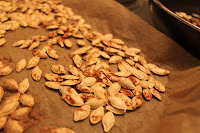
Baked Pumpkin Seeds

If you are carving a pumpkin for Halloween you might as well make the most use of all of it. So instead of throwing away all the seeds you pull out, save them and create a yummy snack. The hardest part about baking pumpkin seeds is getting them out of the pumpkin...and you have no choice but to do that if you are making a jack O' lantern. After that, the hardest challenge you will face is deciding what flavors to make!


Clean out your pumpkin and put the seeds in a bowl.


Clean the seeds using a strainer and cold water. Get all the stringy pumpkin parts seperated from the seeds.


Decide what seasoning you would like to use on your pumpkin seeds. This time we made four different flavors:  Salt, cinnamon and sugar, spicy cayenne pepper and brown sugar.


Split up your seeds in different bowls depending on how many flavors your will make. Mix your seasoning in with the seeds.


Spread your seeds out on baking sheet covered in parchment paper. It is important that the seeds are spread out flat so that they all get baked evenly.


Bake on 350 F for 10 minutes. Flip (or at least mix around) the seeds and bake for another 5-10 minutes. Once finished the seeds should be dry but not burnt.

If you make anything with sugar (brown sugar, cinnamon and sugar) keep a close eye on them. You do not want the sugar to burn!


The seeds will stay fresh in an airtight bag or box for a few days. Try any combination that you think would be good. Garlic, paprika and cheesy seeds are just a few more examples.


Carving the Perfect Pumpkin

Be prepared for a mess! Newspaper important!
Carving a jack O' lantern for Halloween is the norm in the USA but in Germany it is much less common. You have to look around if you want to find a proper pumpkin for carving which is big enough to carve a true face or picture on.

As an American, she said that Halloween wouldn't be Halloween without carving a pumpkin and as a German, he had never had the experience before and was all for giving it a try. After trying four different grocery stores we finally found proper pumpkins at a vegetable stand.  We took them home and he got taught the fine art of creating a jack O' lantern.

Easiest way to carve


To carve a pumpkin you really only need the pumpkin, a spoon and a good serrated knife (like a steak knife). If you want to be a little more fancy we recommend you either use paper and a push pin or buy a pumpkin carving kit.


Don't make a perfect circle!
Start by cutting a hole in the top of your pumpkin. Go around the stem and make it wide enough that you will be able to get your hand inside. It is very important to cut at an inward angle! If you do not do this (and you cut straight up and down) your top will fall into the pumpkin when you put it back on at the end. It is also smart to not make it a complete circle but instead add a jagged section somewhere. This way you know which way the top fits back on. Once the top is off cut any remaining stringy parts on the top so that it is flat and clean.

Save the seeds to bake later!


After making a hole in top, start to remove the insides of the pumpkin. We suggest you keep the seeds and bake them as we did. You can read about how to best bake pumpkin seeds here.

Scoop out the inside
Take out the insides and use the spoon to scrape the inside of the pumpkin. You do not need to get everything out (you do not want to make the walls too thin and you will find yourself in a never ending battle) but you also do not want stringy pumpkin parts left inside. These will make your carving not look very nice and might catch on fire when you light your pumpkin.

Once the inside is cleaned out you can get ready to carve. It is up to you if you want to make your own picture or face by freehand or if you want a plan. We used an already made picture that came with our kit.If you do not have this you can print out a design from online or draw your own. Anything works! Haunted houses, cats, witches, words, bats, or clowns!
Pin on the outline

Poke the outline onto your pumpkin
Take your picture and tape or pin it onto your pumpkin. Then, use a push pin or other good poker to poke holes every few millimeters  until the entire outline of the picture is now on the pumpkin. If you make your own picture remember that pieces need to be connected to the rest of the pumpkin or you will end up with just one giant hole!


Carefully carve!


Start cutting the pumpkin, following the outline you made. If you will be cutting out a large section, sometimes it is better to cut it into smaller sections and push those sections out one by one.


Carve out each section of your pumpkin until your image is complete. Smooth out any edges which need it, light a tea candle to place inside and add the top you cut out in step one.
Place outside for you or your neighbors to enjoy! Depending on the weather of where you live the pumpkin should last between five days and a little over a week.

Happy Halloween everyone!!!

Wednesday, October 26, 2011

Amazing Banana Crunch Muffins


I spent the past week in Romania and while there I spotted silicon muffin cups. We have been looking for some for the past few months but in Germany they are extremely expensive. In Romania, not only where they much cheaper but I had some leftover Lei (this is the currency of Romania :)) I just had to use up so I snatched them right up, no guilt :)
 
When I got back I just knew that I had to test them out. We had some very ripe bananas so banana muffins seemed like the perfect test subject. These muffins turned out to be excellent and the only reason that they have not been made a second time already is because we will have to buy new pants if we keep eating so many!

To make these muffins you need:

1 1/2 cups + 2 Tbs flour
1 teaspoon baking soda
1 teaspoon baking powder
1/2 teaspoon salt
3 bananas
3/4 cup white sugar
1 egg
1/3 cup + 1 Tbs butter
1/3 cup brown sugar
1/8 teaspoon ground cinnamon

Almonds or other nut (optional)

Mash mash mash
Preheat oven to 375 degrees F (190 degrees C). In a large bowl, beat together bananas, sugar, egg and melted butter. We do not have a good mixer so I just did this by using a fork. Add 1 1/2 cups flour, baking soda, baking powder and salt. Stir together until everything is fully moistened and combined. 

Our first no nut half
We could not decide if we wanted to try to add nuts to our muffins or not. Our solution was to spoon in half of the batter into muffin cups, either with paper cups or lightly greased, and then add chopped almonds to the other half and finish filling up the muffin cups. We loved both variations but the muffins with nuts were our favorites. The nuts gave them a little extra munchy texture. 

A little clumpy :(
After filling the muffin cups, mix together brown sugar, 2 tablespoons flour and cinnamon in a small bowl. Cut in 1 tablespoon butter until mixture is mixed but still course. Sprinkle topping over muffins. Bake in preheated oven for 18 to 20 minutes (ours took 22 minutes).

Germany does not have what Americans would consider *regular* brown sugar. Instead it is not moist but more like regular sugar, except the individual granules are larger. Because of this we did not think that our topping would come out properly. We added a bit of water to our mix (in the hopes of making it more like moist American sugar). 

Not the prettiest but proper brown sugar will fix that

It worked but I think we used a bit too much water and it became clumpy. It tasted great but did not look too pretty. This just means in Germany you need to experiment a bit more with the crunchy topping than you do if you are in the USA or have moist brown sugar.

Seriously, we mean it, try these muffins! They are absolutely delicious!

Saturday, October 22, 2011

Fleischküchle (German Meatballs)

Fleischküchle is a dish that comes out of the south (and Schwäbisch) part of Germany. They are like meatballs but instead of being served over pasta they are eaten on their own with gravy and side dishes such as mashed potatoes and vegetables. They are easy and quick to make. Of course, we put in garlic and onion but if you do not like either of these things it is no problem to leave them out.

You need:
1 pound ground beef
1 small onion, chopped finely
1 bulb garlic, chopped finely
1 egg
Salt and other seasonings
Bread crumbs
Oil for frying


Cut the onions and garlic and mix with the egg and add  the raw ground beef. Pour in about 1/3 cup of bread crumbs. Add a teaspoon of salt and some other spices (such as Italian mix, basil, and pepper). Mix the meat mixture (with your hands is best). Continue to add bread crumbs until the mixture is only slightly moist but still holding together well.


Make small balls (about 1.5 inches across), just like meatballs. At this time it is good to pour a good amount of grease into a pan and heat on high. Once the grease is very hot, place each ball into the pan and let cook for a few minutes, or until a crisp brown.


Turn and cook on the other side until completely brown and cooked through - about 6 minutes total.


It is very important to get the pan hot before putting in the Fleischküchle or they will not have a crisp brown outside.


Serve with mashed potatoes, some type of vegetable (we like green beans) and a brown gravy. The American likes ketchup with them, he says they should be eaten with only the gravy.


Thursday, October 20, 2011

Soft Caramely Apples


We know, just looking at them makes you crave some more


This is a quick and easy dessert which is perfect for those late nights when you have a craving for something tasty.


All you need is apples, brown sugar and butter. This time we ate our caramely apples over vanilla ice cream but sometimes we put them in pastry dough, cook for about 10 minutes and have a quick homemade version apple turnovers.


Cut two apples (any type works. I try to use sour apples but usually sweet apples are all we have around) into medium sized pieces (about 8 to 10 pieces per apple is normal). We were so looking forward to our tasty dessert that we did not even peel them. It is up to you if you want to leave the skin or not (There are more vitamins if you leave the skin ;) ).


Cook the apples in a pan over medium heat with two tablespoons of melted butter. Cook for about 7 minutes or until the apples are quite soft. Add 3-4 tablespoons of brown sugar and cook for another 3-5 minutes. The apples should be soft and sitting in a delicious looking caramel sauce. If you want extra caramel sauce use more butter and more brown sugar. You can also add extra brown sugar if you love really really sweet apples.

Serve over vanilla ice cream or place in pastry dough (store bought works great!) and cook for about 10 minutes until the dough is brown.


Be careful, this recipe is addictive and supper easy. You will find yourself craving soft caramely apples all the time!

Tuesday, October 18, 2011

Sweet Crepes

Crepes can be eaten for breakfast, lunch dinner, or even late night snack (Any time because it's sooo good!). This means, no matter what time it is when you get a craving, you can make awesome crepes.
We eat crepes in two ways, sweet or savory.
This time we are sharing with you our sweet crepes. Savory crepes are made the same way, the only difference is that we make a meat and vegetable filling to go with them. Look for a recipe for savory crepe filling in the future.


For crepes you need (2 persons):
~300 g flour
~500 ml milk
1 egg
pinch of salt
Oil (sunflower or similar)
Filling - Nutella, banana, apple sauce, etc


Beat the egg in the milk. Add flour slowly and mix until the batter is just right - not too thin and also not too thick. Let sit in the refrigerator for about 15 minutes (this is kinda a chemical reaction which happens here with the milk and the flour... if we would tell you... we would have to kill you! :D).
A few minutes before you get the batter out of the fridge heat a small amount of oil in a pan over high. There should not be a lot of oil but just enough to cover the entire pan.


Wait until the oil is very hot and then pour a large scoop (he likes to use a soup ladle, I use a one cup measure not completely full). Pick up the pan and swivel the pan around so that the batter covers the entire bottom. Wait about one minute and use a spatula to get under the crepe and flip it. Each side should take only about one minute. (If you like the advanced version... try to flip it with the pan ;) - but we are not responsible for pancakes stuck to your ceiling haha)


Warnings:
If you are making many crepes you will need to add more oil to the pan.
The first crepe never turns out very well! We have no idea why but it is just the evil evil curse of crepe making. Don't let it frustrate you, just throw it out and keep going!


Serve crepes with anything you think would be good. We like bananas with Nutella  and apple sauce with cinnamon and sugar. Jelly, honey, or peanut butter would also be very good.


Put the filling you would like on the middle of the crepe, roll and enjoy!

Sunday, October 16, 2011

Simple Nachos


Nachos are definitely not very common in Germany and when we are craving some the only real choice is to make them ourselves or drive quite a ways to pay a ridiculous amount of money. For that reason, we now make them ourselves. For Americans, nachos are no big thing but I recommend trying this recipe if you are stuck in a rut of only using not very tasty looking nacho cheese from a jar. Are nachos Mexcian? That we can't really answer, but we do know they are delicious!
 
All you need to make these nachos is nacho chips, grated cheese, tomato sauce (we use pizza tomatoes which is sauce with some chunks), sour cream, and lots of seasonings.

Lay the nacho chips out on a baking sheet. Do not let them overlap too much. Cover with grated cheese and put them in a hot oven (either on broil or just on regular bake) until the cheese is melted.


While you are waiting for this chips to finish (or before if you are like us and forget about them when cooking something else) pour the can of tomato sauce into a pan and heat on medium high. Add about one tablespoon of sugar (good to start with less and taste it since you cannot take it back), pepper flakes, Cholula sauce (or other hot sauce), salt, pepper, oregano, and a little basil.  We use an Italian mix to save time.


Cook until thoroughly heated and the chips are done. Serve tomato sauce over chips with sour cream to finish it of. She likes lettuce with her nachos, he is not as big of a fan. Other toppings can be added including Jalapenos (hot peppers), olives, beans or guacamole.


These are a great starter course to serve with the burritos we blogged about earlier found here.

Also, highly recommended for your time in front of the tv while doing nothing ;).

Enjoy!

Wednesday, October 12, 2011

Paniertes (Breaded) Schnitzel

Schnitzel is a classic German dish and definitely one of the first things Americans think of when they hear Deutschland (after Lederhosen, beer, and Bratwurst :) )Schnitzel looks a lot harder than it is to make. In reality, it is quite quick and doesn't take a lot of ingredients. We recommend that if you are making schnitzel you also make potato salad to go with it. If you do not want to make potato salad, schnitzel also goes well with mashed potatoes or french fries. If you do want to make potato salad, you can find our blog entry about it here.

                                         Make your own sizzle sizzle mjumminess

Schnitzel comes in various forms but our favorite is paniertes schnitzel, also known as breaded schnitzel. Usually served with lemon, we also sometimes make a onion/mushroom sauce (This is then called Jägerschnitzel (hunter's schnitzel) - don't ask us why ;) - Thanks to Anonymous for suggesting it might have something to do with hunters collecting mushrooms in the forest and eating them with many meals. ) to go over it - we like that reasoning!. This time we did both.

Ingredients needed:
One slice of pork per person
Breadcrumbs
Flours
One egg per schnitzel, whipped
Oil (sunflower or similar) for frying
salt and pepper

To top:
Lemon
Mushrooms
Onions, sliced in rings
Brown gravy

Cut off any unwanted fat from your meat. Lay it out under a piece of plastic wrap and use a mallet (or rolling pin if you do not have one) to flatten/tenderize the meat. Then set up an assembly line with three shallow bowls. In one pour out flour sprinkled with salt and pepper, in the second beat the eggs. Breadcrumbs go in the third bowl. Dip the meat, one at a time in the flour, in the egg, then breadcrumbs and repeat. Both sides should be completely covered with all three toppings. We suggest you use one hand for the egg bowl and the other hand for the dry ingredients so you do not end up with a sticky, flour covered mess on your hands.


Heat a pan with a solid layer of oil. Make sure the pan is very hot before putting the meat in. Cook on each side until it is nice and brown. Give the meat a good few minutes before checking on it so that a nice crust forms. Sometimes, if you try to flip it over too early the outside layer begins to fall off.(Don't worry... these chunks are very tasty, crunchy and fatty nooom!)


Cook thoroughly and serve with a lemon slice or...

If you would like to try the mushroom/onion gravy start a pan with a small amount of oil at the same time you heat up your schnitzel pan. Slice mushrooms thinly and onions into rings. Cook until nicely brown. Make a brown gravy and pour it over the onion/mushroom mix (or if you are like us just heat up store bought gravy).
Serve over the schnitzel instead of lemon.

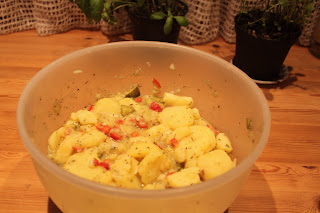
German Potato Salad - Straight from the German


A friend of ours inspired us to make potato salad the other night. He was telling us about his American Oktoberfest experience and said that he had the best German potato salad of his life. It has been a while since we have made a true German meal, and especially potato salad, and our stomachs got hungry just thinking about it. We decided it was time to get to work and make some potato salad for ourselves.

Map of Swabia thanks to Wikipedia
The potato salad we make is Swabian German potato salad (Schwäbischer Kartoffelsalat). We promise this is the real deal for you Americans since he comes straight from the heart Swabia (the southwest part of Germany in Baden-Württemburg). If you are German (or maybe the Americans too) and have your own recipe style let us know. We are always up for changing things around and trying again :)

This potato salad should be made a minimum of 30 minutes before you plan to eat so that the broth has time to soak in. We made our potato salad about 2 hours early so it was nice and flavorful by dinnertime.

To make our style of German potato salad you need:

About 1 kg  (around 2 pounds) potatoes
1 large onion, chopped finally
1 bell pepper, chopped finally
4 medium pickles, chopped finally
200 ml vegetable broth (potatoes should not be swimming so you might not need this much)
70 ml apple vinegar
30 ml olive oil or sunflower oil
1 Tbs hot mustard 
Pepper, salt, oregano, rosemary, parsley, basil

Boil the potatoes until they are soft enough to easily stick a fork through. Our potatoes were medium sized and took about 10 minutes.

Very easy to peel after being boiled


Dump out the potatoes into a colander, run under cold water and peel. Since the potatoes were boiled the skin will easily comes off just by rubbing them with your hands.


Cut the newly peeled potatoes into large chunks. If you like the pieces can be rather skinny, but we really like a mix of big and small pieces.


Place in a large bowl and cover with onion, pepper (any color is fine, we use red because the color looks nice with the white onion and green pickles), pickles, vegetable broth (enough that that potatoes are very wet but not swimming), apple vinegar, olive oil, mustard and a generous amount of the herbs.


We mix the mustard, olive oil, and vinegar together before adding it to the potatoes so that the mustard does not clump. Add broth on its own so if you decide not to use it all there are no other ingredients that get left out.


Stir and let sit for a minimum of 30 minutes. If you want your potato salad to be warm for serving, leave it out and serve it within 1 hour. If you do not mind it cold (like us), you can put it in the fridge and let it sit  for hours (even overnight). We think the best taste is fresh, and within 1 hour of preparing).

We recommend serving this potato salad with paniertes (breaded) schnitzel. You can find our blog post for schnitzel here.