Thursday, December 29, 2011

Jelly Cookies (Marmeladen- Plätzchen)


These cookies are a German Christmas tradition. We were unsure how hard they would be to make but it turns out not to be bad at all. Other than being a bit time consuming because of needing to put the dough in the fridge, they are as simple as the average rolled cookie - but look quite fancy!


Ingredients:


300 g flour
200 g butter
75 g sugar
1 package (15 g) vanilla sugar (vanilla works too, but use only 1 tsp)
1 pinch baking powder (I would guess this is about 1/2 tsp, but we really did a pinch)
2 eggs
1 Tbs (or EL) whipping cream
150 g (about 1 cup) of jelly, any type
Almonds, chopped

Mix the flour, butter, sugar, vanilla (or vanilla sugar), baking powder, and one egg. Put in the fridge for at least 30 minutes or until you are ready to use it.

When you are ready to roll out the cookies, flour the surface you will roll on first and preheat the oven to 200 C (390 F).  Roll out your dough to only about 1 mm thick. Cut out any shape you would like (typically hearts and stars are used in Germany). Half of you cookies should be cut as as usual, the other half should have some type of hole in the middle. Because we did not have a tiny heart cookie cutter, we used a small circle. It is also possible to do one big and one small, just make sure to leave a rather thick border.

Once all you cookies are cut out, beat an egg and mix with the Tbs of whipping cream. Brush the top of the cookies with no holes. Then flip a cookie with a hole onto this and secure. Brush the tops again with egg (to make them turn a nice brown in the oven) and if you wish to add nuts, sprinkle chopped almonds. Again, because of allergies we did half with nuts and half without. 
Cook the cookies for about 12-15 minutes or until golden brown.


After the cookies are out of the oven and cooling,  heat the jelly in a pot on the stove until it becomes thin and boils. Then scoop the jelly into the hole of each cookie.

Let cool and serve plain or with a dusting of powder sugar.

Saturday, December 24, 2011

Carrot Cake Muffins

He first had carrot cake when he visited Canada as a child and now it is a birthday staple. She never really gave much thought to carrot cake, but has started to perfect her American version for the occasional dessert for him. This time we decided to try making our usual carrot cake recipe into muffins because they are easier to serve and we love using our muffin cups! Of course, you can make a cake instead.

Carrot Cake: 

2 cups flour
2 tsp baking powder
2 teaspoons baking soda
1/2 teaspoon salt
2 teaspoons ground cinnamon
2 cups white sugar
4 eggs
1 1/3 cups vegetable oil
4 cups grated carrots
3/4 cup chopped walnuts or almonds (we use almonds)
  
Preheat oven to 350 degrees F (175 degrees C). 

Grease and flour a 9x13 inch pan. Sift together the flour, baking powder, baking soda, salt and cinnamon. Set aside.
In a large bowl mix together the sugar and eggs. Stir in the oil and dry ingredients (flour, baking powder, baking soda, salt and cinnamon). 


Fold in the carrots and nuts.

 
This time we made half with nuts and half without because of allergies.


Spread into the prepared pan or muffin cups. 


A cake will take 40 to 45 minutes, muffins take about 15 minutes. Check if done with a toothpick. 


Cream Cheese Frosting:

1 (8 ounce) package cream cheese
1/4 cup butter, softened
4 cups powdered sugar
1 cup finely chopped almonds (or other nut)

Beat the cream cheese and butter until completely mixed together. Add the powered sugar and optional nuts. Once again, we made half with nuts and half without nut icing.

Frost the muffins or cake once they are cool.


Friday, December 23, 2011

Weihnachtsmarkt Esslingen Hackfleischpizza

Heading toward the Esslingen Weihnachtsmarkt
Last weekend we visited the world famous Esslingen medieval Christmas market. There we had some lamb pizza which was so good that we decided we needed to try and make it at home. After a bit of searching, we found that the lamb pizza served in Esslingen is a lot like Swiha, a meat pizza from Lebanon. We have been cooking many different dishes for upcoming Christmas dinner so we decided to add these to our list.

We made one traditional type (with ground beef instead of lamb though) and at the same time we used the dough to make mini veggie pizzas with a white garlic sauce.

For both of these recipes you need to make pizza dough. You can find our recipe in our Cheap and Easy Homemade Pizza entry

For the Esslingen mini pizzas:

300 g ground lamb or ground beef
1 Tbs cumin (if you are not much of a fan of cumin we advise only half this amount)
300 ml hot water
2 tomatoes, diced
1/2 tube of tomato paste
1 large onion,sliced in rings
chili powder, parsley, salt, pepper

Preheat oven to 250 C (475 F). It is important for the pizza that the oven (and baking sheet) is extremely hot before cooking anything. This makes the pizza crispy!


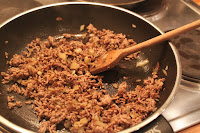
Heat a saucepan on high. Add the cumin and for a short amount of time let brown. Add the onions and ground lamb (or beef). Cook thoroughly. Add a tiny bit of water and mix well. Add the tomato paste to the pan (away from the other ingredients) and roast for about one minute. Then mix with the rest of the ingredients.


Add the 300 ml of hot water and let simmer until reduced. After there is little liquid left add the diced tomatoes and seasonings. Continue to cook until hot through.


While this is cooking, roll out the pizza dough and cut into small circles. A original "Maßkrug" is best!


 Top with the meat mixture and cook for 15 minutes.


For the vegetable and garlic mini pizzas:

Garlic Sauce:
1 Tbs butter
1 1/2 Tbs flour
1/2 cup milk
2 cloves garlic
1 Tbs Italian seasoning mix
1/4 cup shredded parmesan cheese
salt, pepper

Topping:
Bell pepper
Mushrooms
Onion
Tomato
Anything else you think sounds good!

 Melt the butter on the stove over medium. Add the flour and whisk together. Slowly add the milk, continue to whisk. Let the mixture get thick but do not let it burn! Add the seasonings and garlic.

Make this right when you are ready to use it. It gets cold and thick quickly making it very hard to spread!


Spread on the rolled and cut pizza dough, add slices of onion, mushroom, bell pepper, or tomatoes.


Cook on 250 C (475 F) for about 15 minutes. It is important that the oven is really that hot before you put them in and that the baking sheet is heated up in the oven. This makes sure that the bottom of the pizza is crisp and not soggy!


Thursday, December 22, 2011

Choco Crossies (Reindeer Poop)

Using up our chocolate
I don't know why these remind me so much of reindeer poop, I actually have never even seen reindeer poop to compare it to, but when he made choco crossies, reindeer poop was all I could think about.

This recipe is as easy as they come. It is all a great way to use up all that chocolate from your advents calendar that you will never actually eat.

What you need:

Chocolate
Cornflakes
- About a 3/2 ratio

Add cornflakes and mix


Melt the chocolate (in the oven or the microwave). Stir in the cornflakes, spoon onto parchment paper (small mounds) and let cool. Finished!

Yeah, when I said easy I meant EASY.


Make some reindeer poop and feel the Christmas spirit!

Classic Jewish Noodle Kugel

Kugel is a Jewish dish made from either potatoes or noodles and usually served as a side dish on Shabbat (Friday evenings).  We made kugel for the first night of Hanukkah.

The first time she served him kugel he thought she was joking about it really being made for a meal. It is quite a sweet dish and does seem like it could pass well for a dessert. He said that even though it has noodles it could be easily served with vanilla sauce or ice cream. Now, he is a fan of the dish...as long as it is on brought out once a year :)

The whole Hanukkah thing is very new for him. From as far as she can tell by her students at school, Jewish culture and holidays are not taught at all in Germany, so when she first invited him over for kugel and latkes he didn't really know what to expect. But, with another reason for good food and more presents, even he could not resist adding another holiday to December!


Ingredients for kugel:
16 ounces of egg noodles (450 g)
1/2 cup margarine
4 eggs
1 cup sugar
1 1/2 cup applesauce
1 tsp vanilla
cinnamon

Preheat the oven to 350 F (175 C)
 
Cook the egg noodles in boiling water for about 5 minutes. They should be just getting soft but not as finished as if you were going to eat them straight away.

Once the noodles are finished, drain, add to a large bowl and add margarine. Mix until melted. Add all of  the other ingredients except cinnamon. Mix well.


Pour mixture into a baking dish, dust with cinnamon and cover with aluminum foil.


Cook for 30 minutes. Remove aluminum foil and cook for another 20-30 minutes. The top should be golden brown when finished.

Even if you are not Jewish, try this dish. We promise it will be different from anything you have made before.


Monday, December 19, 2011

Cinnamon Christmas Coffee

Christmas is right around the corner and we are getting into the spirit. Our advent calendar has been up since December 1 and we have been enjoying small gifts each morning. We have been burning our Adventskranz (Advent wreath) each Sunday. No stockings or tree this year but our presents are wrapped and under the rubber tree (sometimes you just got to go with the flow!)

We made our gingerbread houses...


And perhaps most importantly, we have our cinnamon coffee! With just your regular coffee and a teaspoon of cinnamon you can make your whole house smell like Christmas in just a matter of minutes. We make it with decaf at night, light our advent candles and curl up on the couch to watch a movie. Perfect for the cold and snowy weather we have been having.

It's beginning to feel a lot like Christmas!


Super easy cinnamon coffe:


Whatever coffee you use normally (need grounds not beans)
1 tsp cinnamon


Add 1 tsp of cinnamon for every 3-4 scoops of grounds you use.

Mix the cinnamon into the grounds and make coffee as usual.


In these pictures we are having coffee at night so we are not using our coffee maker but instead our manual drip.
For only a few dollars you can make coffee one or two cups at a time without having to set up your entire machine.


Add your usual, sugar, cream, or milk and enjoy the smell and taste of Christmas!

Craft: Santa and Rudolph Spoons


Today, we are going to change it up a little bit and instead of a recipe share a craft. She works part-time as an English teacher while finishing her master's and wanted to test out an idea she had for a lesson this week.  The result were some pretty adorable and Christmas-y plastic Santa and Rudolph spoons. Good for kids of any age (or adults, we had fun too!), she is going to try it with her 5th grade class.


What you need:

Plastic spoons
Googly eyes
Small colored cotton ball noses
Cotton balls (white)
Red and orange or brown paper
Glue
Black marker


Santa:


Fold red paper in half and cut out a triangle (there needs to be an opening on the bottom of the triangle so you can glue it to the spoon).


Pull apart the white cotton ball so it looks like fluff. Glue to the bottom of the red triangle which will be later glued to the top of the spoon.  Fold over the tip of the hat so it looks like the top of the hat is falling down. Use a small piece of cotton for the end of Santa's hat.


Glue the hat to the top of the spoon (surround the spoon so both the back and the front is glued)


Add two eyes, a nose for Santa and draw a mouth.

Take more white cotton, pull apart, and add below the mouth to make a beard.

Finished!


Rudolph:


Glue on two eyes and a red cotton ball for Rudolph's famous nose.


Use brown or orange paper to cut out antlers. Fold the paper in half and then cut so that both antlers look the same.


Glue the antlers onto the back of the spoon.

Add a mouth and ta-da. Easy peasy.


Using these supplies you could easily make Rudolph's reindeer friends and a Mrs. Santa.


Sunday, December 18, 2011

Peanut Butter Thai Chicken

We have a Chinese/Thai restaurant here in Germany which we love, and visit much more than we should, but that doesn't mean that sometimes we want to save money/not have to go out in the cold/eat healthier and make our own Asian food. Our friends must know this because for his birthday we got given two amazing Asian cookbooks which have a slew or recipes we want to try.

To start our quest of finding a good selection of Asian recipes we made peanut butter chicken. Of course, as the American she thinks the idea of peanut butter with anything is great! He thinks it cannot be very healthy, but she proved him wrong and made this pretty low-fat but tasty dish.

For peanut butter chicken you need:

80 g dry rice
240 g chicken breast
1 tsp oil
250 ml tomato juice (about 1 cup)
500 g mixed vegetables (we use less chicken and more vegetables than this)
5 tsp peanut butter (creamy not chunky)
1 tsp curry
salt, pepper, chili flakes


Cook rice according to directions. While rice is cooking, season cut chicken into squares, season with salt and pepper and cook with oil for about 5 minutes.


We go heavy on the veggies, light on the chicken


Add tomato juice, vegetables, peanut butter, and curry. Cook covered for at least 10 minutes or as long as it is needed for vegetables to be cooked through. We use a mix of fresh veggies (zucchini, onion, bell pepper, sprouts) and a frozen Asian vegetable mix.


Once vegetables are cooked and the sauce thickens add any other spices you might want. 
We use chili flakes.


Serve with rice and enjoy! 1/2 has about 500 calories...not bad for such filling and delicious food!

Wednesday, December 14, 2011

Cottage Pie

Pop quiz!

What is the difference between shepherd's pie and cottage pie?

Do you know?

They are actually very similar. The difference is that shepherd's pie is made with lamb and cottage pie is made with ground beef.

We took the easy (and cheaper) route this week and made the English classic, cottage pie. It was warm and filling - just what we needed on a cold winter's night.

Don't be scared off by the long ingredients list. Most of it is herbs and spices which you can add in or leave out as needed!

For Cottage Pie you need:
We love seasonings! Lots of flavor - no fat!

1 pound ground beef
1 onion, chopped
3 carrots, chopped
2 Tbs flour
1 Tbs tomato paste
1 1/2 cups beef broth
Peas, corn or any other vegetables wanted
Mashed potatoes (make your own or use instant)
1/2 tsp cinnamon
2 Tbs parsley (fresh is best)
1 Tbs Italian seasoning
Salt, pepper and chili flakes if desired
Cheese, optional

Preheat the oven to 400 F (200 C).

Saute the beef, onion and carrots over medium heat.

Don't be scared to dump it in!


After the meat is fully browned, add flour, cinnamon, herbs and any other spices you may want such as salt, pepper and chili flakes.  Add beef broth and tomato paste.


Simmer for 15 minutes

Mix everything together well and let simmer for about 15 minute or until most of the liquid has disappeared.While the mixture is simmering, make mashed potatoes. It is up to you if you want to make these from scratch or use instant.


We added peas and corn to our cottage pie but not until the very end. This is because they are already quite soft and we did not want them to become mushy. We just left them in for about 1 minute to warm up before taking everything off the stove.

Cover with mashed potatoes


Take the meat mixture off the heat and pour it into a oven-safe casserole dish. Cover with mashed potatoes and cheese if desired. Bake at 400 F for 25 minutes or until top is brown (and if covered with cheese, the cheese should be melted and bubbling).


Enjoy!
Serve with bread and salad. Warm, cozy, and very simple to make. This recipe makes a lot so plan to feed a family of four or to have leftovers!