Friday, March 30, 2012

Arabic-Style Cabbage Rolls


Even if you are not a fan of cabbage, you will like cabbage rolls. With a flavorful filling and cooked in a tomato broth until soft, there is nothing truly cabbage-y about these.

This recipe isn't super easy but it also looks a lot more complicated than it is because of the number of ingredients


For three-four people:

1 head of cabbage
300 grams ground lamb or beef
1 onion, diced
2 cloves of garlic
1 egg
200 ml vegetable broth
2 EL (Tbs) oil 
2 EL (Tbs) parsley
1 EL (Tbs) mint
1 EL (Tbs) Coriander
500 g tomatoes (we used diced tomatoes from a can)
1 TL (tsp) cumin
1 TL (tsp) sweet paprika
1/2 TL (tsp) chili flakes
salt and pepper

Begin by putting a large pot of salt water on the stove to boil. Then cut the bottom of the cabbage head to make peeling off the layers easier.

Then pull back the layers one by one trying to keep the individual pieces as large as possible. Yes, we know what you are thinking, "That doesn't sound too hard," but it is! At least we had a hard time getting large pieces off. We pulled off a good number (15 or more) because we couldn't decide if they were large enough to use or not. Since you probably aren't dying for leftover cabbage, feel free to take off a lot :)

Rinse off the cabbage pieces and place them in the boiling water. Cook for 2-3 minutes. Drain and rinse with cold water.


While the pieces are boiling you can make the meat mixture. Combine all of the spices, the raw meat, the egg, 1/2 the onion, 1/2 the garlic, and 2 EL (Tbs) of the tomatoes. Basically, this means everything goes in except for the all of the tomatoes, 1/2 the garlic and onion, broth, oil, and the cabbage.


 Mix all the ingredients together well. Then spread out one cabbage leaf and add a spoonful or two of the meat mixture (depending on the size of your cabbage piece). Roll like a burrito, making sure to tuck in the ends.
We had a hard time with this (especially since our pieces were quite small) so we gave in and used toothpicks to hold the rolls together. Not as beautiful but they got the job done!


Continue until you have used up all of the meat or all of the cabbage...not that we are sure what choice there is other than stopping.


On the stove, heat the oil, remaining tomatoes, onion and garlic, and the broth in a large pot (you want to be able to place as many cabbage rolls flat as you can). If you have extra meat (like we did) you can also add that to the liquid mixture and cook it along with the rolls.


Place all of the rolls into the pot and in the broth as much as possible. If a few must overlap that is okay. Cover and cook for about 40 minutes.


Remove and serve with bread, rice, or anything else that sounds good to you. He ate his with Knödel (a German dumpling) and she had hers with toast.

Monday, March 26, 2012

Mix-Up Monday: Light Switches (Lichtschalter)

(joyofsox.blogspot.com)

Just a short silly difference today: Light switches (or Lichtschalter in German).


Light switches come in many varieties but the typical German light switch and the typical American light switch are quite different.


Two German switches


German light switches are quite large, flat, and square. You push on the top or bottom to turn the light either on or off.


Typical American switch
(photo-dictionary.com)


American light switches are small, stick out, and are more of a knob. Usually you push the knob (ok, really a switch since it is a light switch) up and down to turn the light on and off. Although the actual switch is small, the surrounding part makes the light switch look very large. Actually, we would estimate almost twice the size of one German light switch.


Switch becoming more popular in the USA
(smarthomeusa.com)


We both have to agree that we like the German light switches more. When your hands are full, all you have to do is push up again them and you can turn on or off the light. This is unlike the American light switch which you must use your elbow or hip and try to push the know up or down correctly...sometimes leaving a tiny bruise.  Although, we think there is a new type of switch becoming popular in the USA which is easier to bump with a hip or elbow.


The one thing that bothers her about German light switches is the light for the bathroom. In most of the apartments and houses she has visited in Germany, the light switch is outside of the bathroom door. Time after time she has walked into the bathroom and had to go back out to turn on the light.

Bathroom light switch over a normal hallway switch


There is usually a little orange light on the switch which lets you know if the light inside the bathroom is on or not. This good if you aren't sure and don't want to knock. Even though this does seem like a good idea, she can't get over the feeling that she is going to be left in the dark because someone on the outside will turn off the light.


The reason for a light switch outside instead  of inside the bathroom? Mystery to us. If you know why, leave us a comment and share your wisdom.

Sunday, March 25, 2012

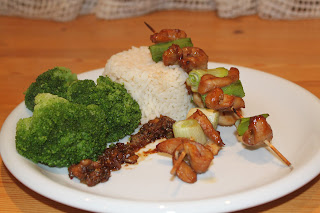
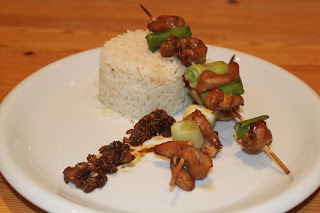
Asian-Style Honey Chicken Kebabs


This Asian chicken is not much different from stir frying chicken with soy sauce, but the honey and letting it marinade for hours gives it a stronger flavor. Using skewers also makes it look a lot more fancy :)


For two portions (about five kebabs total)

200 grams chicken (breasts cut into strips or already cut chicken pieces)
3 Tbs onion, chopped finely
2Tbs soy sauce
1/2 Tbs ginger (fresh), minced
1/2 Tbs garlic, minced
2 Tbs honey
Red pepper flakes (if wanted)
2 large green onions

(rice and a vegetable if wanted)


Start the chicken marinading at least two hours before wanting to start cooking. 


Cut the chicken into small strips if not already done. Place in a shallow pan and add the onion, soy sauce, ginger, garlic, honey and if wanted, red pepper flakes. Turn the chicken so all parts get covered and let sit in the refrigerator for a minimum of two hours. During this time you can also soak your skewers in water if they are wooden. This keeps them from burning in the oven.

When ready to cook:

Preheat the oven to 425 F (220 C)


Clean the green onion and cut into large pieces (using the base of the onion only). Remove the chicken from the marinade and place on the skewers, alternating with the green onion pieces.


If you would like to make a separate sauce to go with rice or the chicken, DO NOT THROW AWAY THE MARINADE! We recommend this and think the sauce was the best part of the meal.


Place the kebabs in the oven (middle to high rack). We placed ours directly on the rack even though it meant more to clean up when finished. 

Bake the chicken for about 15 minutes or until done through.


While the chicken is baking, cook the rice according to the package directions. You can also cook a vegetable to go with meal.

If you want a sauce to go with the rice or chicken, place the extra marinade into a saucepan and let cook over medium heat until it thickens. We liked the sauce so much that we think next time we will make extra marinade on purpose :)


When the chicken is finished, serve with rice, a vegetable and the extra sauce.

Saturday, March 24, 2012

Chicken Fajitas

We never really thought about making fajitas at home until we had them out at a restaurant and realized they are no harder than burritos to put together.

We stuck with just chicken, marinated in a lime juice mixture. Added grilled onions, pepper, and all the toppings we love such as fresh salsa and guacamole and served with our favorite Mexican rice recipe and nachos as a starter. 


The whole meal was just as good as when we eat out, with the perk of being 30 euros cheaper and we had leftovers for the next day :)

Marinade (enough chicken for 5-6 fajitas)

*Warning* She just dumped a whole bunch of stuff into a bowl and marinated the chicken. Oops! Use your best judgement with the measurements : ) *

200 g chicken breast (cut into strips)
2-3 cloves of garlic
2 Tbs onion, diced
2 Tbs green onion, diced
1/4 cup lime juice
1 Tbs oil
salt, pepper, pepper flakes, and garlic powder

Let the chicken marinade for at least three hours. We left it for closer to six hours.


When it is time to get cooking:

3 onions
2 bell peppers (bell peppers are really expensive in Germany right now so we used frozen strips)
Package of flour tortillas (fajita size) - You can also make your own but since we were making nachos, Mexican rice, salsa, and Guacamole we felt tortillas would just be too much
Oil


Toppings - Lettuce, cheese, sour cream, guacamole, salsa (or diced tomatoes)


Preheat the oven to 350 F (180C).

If you want to make Mexican rice, start that before you start the chicken. It will take about 20 minutes.


Slice each onion into half and then each half into 3-4 wedges. Thread the onion wedges onto skewers. We used wooden skewers leftover from another recipe that had been soaked for a few hours in water. Use a brush to brush oil onto the onions. This will help them get nice and brown.

Move the chicken into an oven-safe dish (keep it in its marinade!). Bake for about 10 minutes or until chicken loses its pink color. If the strips are thin it should not take very long. At the same time cook the onions in the oven.


Move the onions up in the oven and use broil if after 10-15 minutes of being in the oven they are not getting a slight brown to them.


While the chicken and onions cook, make the salsa and guacamole. With about five minutes cooking time left on the chicken, slice the bell pepper into strips and cook on the stove with a small amount of oil.

Remove the onions and chicken from the oven and the onions from their skewers.


Once the bell pepper has gotten soft, add the onions and let get hot. Add the chicken with all of the marinade. Let cook until most of the marinade has been soaked up or cooked off. This should only take a few minutes.


While the peppers, onions, and chicken cook together, heat your tortillas in the oven.


Remove fajita insides from heat.
Serve with your toppings of choice and with Mexican rice. 


Friday, March 23, 2012

Classic Sloppy Joes


Something you would never find in Germany, she had to make the classic all-American sloppy Joe for him  to try. Although traditionally served on a hamburger bun, we add our own twist and served it on some fresh flat bread picked up earlier in the morning from a local farmer's market. Add some lettuce and tomato and you have the grown up version of a kid classic.


Full recipe (we made half and got about four sandwiches from it)


1 pound ground beef (450 g)
1/2 cup onion, chopped
1 can of tomato sauce (8 ounces)
1/3 cup ketchup
2 Tbs brown sugar
1 Tbs vinegar (she  usually uses apple cider vinegar but we didn't have any and it still worked out fine)


Bread and toppings of choice


Cook the ground beef and onions together on the stove. Once fully cooked, drain the fat from the skillet if there is a lot.


Place back on the stove and add the rest of the ingredients including the tomato sauce, ketchup, brown sugar, and vinegar.


Stir everything in, cover, and let simmer on low heat for 20 minutes.


Serve on a hamburger bun or another type of bread. We lightly toasted our flat bread before making a sandwich. Eat plain or top with salad and tomatoes.


P.S. We have now added a search option to our blog. Type in a keyword and find something yummy!

Thursday, March 22, 2012

Fresh Chunky Salsa and Guacamole

If you are making anything Mexican such as tacos, burritos or fajitas from scratch you might as well go all out and make the salsa and guacamole from scratch too. Fresh salsa and guacamole is also good with plain nacho chips. Eat it as an appetizer or put it out at a party for everyone to snack on. The good thing is you can't really mess these recipes up. Play with the amount of lime juice and salt you like and find your perfect mixture.


We like these with our burrito recipe, nachos, or fajitas.


Chunky Salsa:


2 tomatoes
1 Tbs onion, diced
1 hot pepper, diced (optional)
1 tsp lime juice
few shakes of salt and pepper


Dice the tomatoes in medium to small squares. Mix with the onion, hot pepper, lime juice and seasoning. Add more lime juice or salt if needed.


Guacamole 


1 avocado
1-2 Tbs onion, diced
1-2 Tbs tomato, diced
2 tsp lime juice
few shakes of salt


Scoop out the center of the avocado. Add tomatoes, onions, lime juice, and salt. Mash with a fork until smooth. Add more lime juice or salt as needed.


We always make these at the same time so we use one onion between the two dishes and steal some of the tomatoes from the salsa to add to guacamole.


Wednesday, March 21, 2012

Garlic and Lemon Shrimp Pasta


This pasta has a fresh taste. Unlike most pastas with an oil base, this pasta does not sit in your stomach feeling heavy afterwards. This is because the lemon keeps it light and tasty.

Good as a smaller portion for lunch or a full meal with salad and bread for dinner.


Two servings:

250 -300 g of shrimp (fresh or frozen)
1 Tbs garlic, minced
1/2 cup white wine (dry)
1/4 cup fresh lemon juice
1/4 cup chopped green onion (tops) 
2 tsp olive oil
1 Tbs butter
1 Tbs parsley (fresh is best but dry ok too)
1 tsp red pepper flakes
1/2 tsp salt, 1/4 tsp black pepper (or less)


Pasta (linguini or spaghetti) for two - we used 160-200 g uncooked

Cook the pasta according to package directions.


While the pasta is cooking (toward the end because this recipe does not take long), heat the olive oil in a large skillet. Add shrimp and cook for about 2-3 minutes. Add the garlic and let continue cooking for under a minute.


Add the wine, lemon juice, and butter. Cook for another 2 minutes or so.


Add the finished pasta to the pan with the shrimp. Season with salt, pepper, and red pepper flakes. Mix so the pasta is well coated. Add the green onions and parsley and toss again.


Serve alone or with salad and bread.

Tuesday, March 20, 2012

Easy Peasy Popovers


Last weekend we got an urge for fresh bread with breakfast. These popovers did the trick. They are ridiculously easy to make, take only 30 minutes to bake, and are delicious. We will definitely be making these more often...for breakfast or as a dinner roll.


For six popovers:

2 eggs
1 cup milk
1 cup flour
1/2 tsp salt

Preheat the oven to 450 F (230 C).


Crack the eggs into a medium-large sized bowl. Use a whisk to *lightly* whisk the eggs. They should be mixed well but not fluffy.


Add the milk and gently whisk again so everything is incorporated.


Add the salt and flour and use a spoon to mix everything together. Do not over mix! Just stir it around until everything is mixed together.


The batter will still have lumps but that is not a problem. You want them!


Pour the batter into muffin cups (greased if you do not have silicone ones like us). We got seven popovers out of this recipe.

Bake for 30 minutes. Do not open the oven to check on them during this time. They will fall in and your popovers will have no pop!


Ours got a little brown since they were high up in the oven. They still tasted great so do not worry if yours start to get a little dark. Whatever you do, do not open the oven!


Enjoy with butter, honey, jam, or anything else that sounds good.

Monday, March 19, 2012

Mix-Up Monday: Résumés

If you want to work in another country, you think about the big challenges you will face. Language, work permits, so on so on. Sometimes the smaller details slip by you. For example, who really spends much time thinking about the differences in formatting résumés in various countries? No one (until now!) unless they are applying for jobs and they got down to the part on the bottom of the application that says, "Please paste your résumé here or attach it as a word document."

For the most part, American and German résumés are the same. They are one of the only places in which you can brag about yourself and no one finds any fault in it. We are not going to go into small formatting details here...besides, everyone has their own view on how to properly format a résumé so a country-wide average is almost impossible to find. What we will discuss are the giant glaring differences which cause you to go WHHHHAAAAT??!!?? when you look at a résumé from the other country.

This what is the amount of (or lack thereof) personal information on a German versus American résumé.

In Germany, résumés contain not only the person's name but also their nationality, birth date, place of birth, and a photograph. Also, not as common but not uncommon on a German résumé includes marriage status and religion.

To an American, putting this information on a résumé is unimaginable. Yes, Americans often list their nationality (especially if there is some question of if they would be able to work in the USA), but the idea of a birth date, marriage status, and especially a photo is hard for an American to understand. The first time she found out she needed to change her résumé to fit this style she did feel some resistance. Do people really need to know what she looks like to decide if she will do a good job? Doesn't my year of graduation give you a big enough clue about my age that you do not need to come right out and ask for it?

Many Germans find it strange that it is illegal for interviewers to directly ask questions about age and marriage status in the USA. To them this information is not private and there is no problem with sharing it.

The argument between the two types of résumés is easy. Is there more or less discrimination depending on the format and information given? Does it make sense to share a picture right off the bat instead of losing the job at the interview, perhaps because of your looks? Should you not have a picture so at least you get the chance to prove yourself in an interview before being judge?

There is no real answer and it is definitely not something we will be getting into...we don't even fully agree with each other when it comes to personal information on résumés. What is important is to realize that every country is a bit different, and as much or as little as you agree with the style, if you are going to work in that country you have to be willing to conform.

Saturday, March 17, 2012

Caribbean Peanut Chicken

We can't describe the taste of this chicken. It has a strong peanut butter and lemon flavor which go together better than you can imagine. We will definitely be making this again so we recommend that you try it and see if you can describe the flavors. 

For this recipe you must first make a marinade. Plan to do this at least three hours before you want to cook the chicken.

(We only made half of the chicken but made extra rice and the full amount of sauce for this recipe. You can also play around with it if you want, depending on what chicken to rice ratio you want).

The original recipe:

500 grams chicken breast
1 cup (uncooked) white rice
1 onion, chopped
2 tomatoes, peeled and chopped (we used can tomatoes instead)
1 hot chilli, diced
4 Tbs smooth peanut butter
2 cups chicken broth
1 lemon
1-2 garlic cloves
1 tsp thyme
1 1/2 Tbs curry powder
2 Tbs oil
salt and pepper


Marinade: 

In a bowl or container (that can also fit your chicken), mix together the juice from 1/2 of the lemon, 1-2 garlic cloves (chopped finely or crushed), 1 tsp thyme, 1 1/2 Tbs curry powder, and 1 Tbs oil.

Cut the chicken into strips and add the the marinade. Mix around so that the chicken is fully covered and put in the refrigerator for at least three hours.


Cooking:

Preheat the oven to 350 F (180 C).

Cook the rice according to the package directions.


While the rice is cooking, heat 1 Tbs of oil in a pan on the stove. Add the chicken and cook 4-5 minutes or until brown. Remove the chicken and set aside.


Using the same pan, cook the chopped onions until lightly browned. Add the tomatoes and diced chilli. Cooked on low for another 3 minutes or so.


While the onions and tomatoes are cooking, mix the peanut butter with the chicken broth. Add this to the onion mixture. Add the chicken back into the pan. Stir well and let everything get hot through. Add the juice from the other 1/2 of lemon (to taste, we liked it with lots of lemon, you may want less). Also add a few shakes or salt and pepper.


By this time your rice should be finished. Drain and pour into an oven-safe dish.


Pour the chicken/broth mixture over the rice. Cover and bake for 15-20 minutes.


Mix well and serve. We ate ours plain but it would also go nicely with bread or salad.


Wednesday, March 14, 2012

Apple Pie for Pi Day

Today is Pi Day (March 14, 3/14, or 3.14, for those of you in Germany or other parts of the world who not get Pi Day because the date is written 14/3). It doesn't matter how you write the date, or how much you love or hate math (and of course Pi =) ). Who does not love a day which forces you to eat pie? Not us! To celebrate we went as American as you can get and made an apple pie.

We started with the crust. It is very easy to make your own pie crust but if you want to save time you can use a store bought crust.

For one pie crust (you may want to double this to have a nice top for your pie)

1/2 cup butter
1 1/2 cup flour
1 1/2 Tbs sugar
1/4 cup cold (ice cold) water


Mix the flour and sugar in a bowl.


Cut your butter into small pieces and add it to the flour mixture.


Cut the butter into the flour. You can do this with a pastry cutter, a mixer if you keep it on low, or like we did, just use two knives.


Once the butter is cut in (only very small balls of butter left), add the water. Stir until the dough begins to clump.


Once this happens, stop stirring and knead the dough until a solid ball is formed. Do not add more water! It might not seem like it will never stick together but it will and if you add more water you will have a mess on your hands.


Refrigerate your ball of dough for about 30 minutes before trying to roll it out to make a pie crust.


Apple pie:

6 apples
1/2 cup sugar
2 tsp cinnamon
2 Tbs flour
2-3 Tbs butter
pie crust (uncooked)

Preheat the oven to 350 F (180 C)


If you made your own dough, roll it out and cut it to a size which will fit the bottom and sides of your baking dish.


We do not own any pie tins so we just used a regular rectangle over-safe dish. It might not look like a typical pie but it still tastes like one.


If you have leftover dough, put it back in the fridge to make a nice topping for the pie. 


Peel the apples (you may want to start with only five. Six was perfect for our pie but our baking dish was quite large). Then slice the apples into medium sized pieces. It does not really matter what they look like but the pie will be prettier if you cut them into long strips.


In a small bowl, mix together the sugar, cinnamon and flour. 


Line the bottom of your pie with half of your apple pieces. Evenly pour half of the sugar mix over the apples. Cut the butter into small pieces and place about half of it on top of the apples and sugar.


Finish placing your apples into the pie and cover with the rest of the sugar and butter.

Use any extra dough to make a design for your pie (or if you made a double batch of the crust make a lattice or solid top).


We made the Pi sign in celebration of Pi Day.


We still had dough left so we also made a flower for the other side of the pie.


Cook for 45-55 minutes or until the crust is nice and brown.


Enjoy warm or cold.


Happy Pi(e) Day!!!