Monday, April 30, 2012

Mix-Up Monday: Addresses

from: gizmodo.de


Every country has a mail system and addresses, but how it is written is different depending on where you live. For example, in the USA an address on a letter looks like this (if we could live in such a tasty land):

from: madmikesamerica.com


The Garlic and Onion Lovers
1211 Eaters Way (Street, Blvd, etc.)
Garlic City, Onion State 12122

On the other hand, addresses look like this in Germany:

The Garlic and Onion Lovers
Eatersstraße 1211
12122 Garlic City

As you can see, the order of where the house number and postcode are swapped. While America goes small item to large in each line, Germany goes large to small. Overall, addresses are quite similar unlike some countries (like Japan) which change the order the lines go in, starting with the geographic location (like city) and ending in the person's name.

Another difference between addresses in the USA and Germany is the use of apartment numbers. While in the USA, every apartment has a number (listed after the street name if needed, for example, 1211 Eaters Way #12) Germany does not use numbers. Instead, the mailman must look for the correct name on the mailboxes. This makes sense because most German apartment buildings only have a few families, but the first day on the job must be tough for mailmen in big cities with large apartment buildings.
American Style (www.enchantedlearning.com)

The final big difference between the USA and Germany when it comes to mail is where the address goes on the letter. Both countries place the recipient on the front middle of the envelope. The sender, on the other hand, is placed on the back of the envelope in Germany, versus on the front top left like in the USA. The USA does place the sender on the back of the envelope for formal letters (such as wedding invitations) so once again this difference is not too different.
German style (sender on back) (gutefrage.net)


Whatever you need to send, both the German and American postal systems will get it to you, wherever the address or stamp may be. Just make sure it is not a Sunday!

Saturday, April 28, 2012

Easy Chicken Kebabs for the Grill


We had these chicken kebabs the other night when we decided to do some indoor style "grilling" to lift oUr mood about the rainy weather. We ate these kebabs with the feta cheese recipe shared earlier this week.

There are many types of marinades out there. This one is delicious and takes very few ingredients. It makes enough for a lot of meat and vegetables. Since we were eating alone we did not make too much but left the marinade recipe. We cooked the leftover and poured it over the kebabs for extra flavor before eating. It was also very good with bread.


Marinade:

1/3 cup soy sauce
1/3 cup honey
1/4 tsp pepper
1/4 cup oil (not olive oil)

For grilling:

You can choose whatever types of vegetables or meat that sound good to you. We used chicken, zucchini, tomato, onion, and bell pepper. 


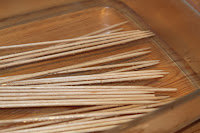
Make the marinade and let your meat and vegetables sit in it for at least three hours. Overnight is also okay. Leave in the refrigerator while marinading. During this time you can also soak your skewers in water so that they are less likely to burn while grilling.


Thread the meat and vegetables onto the skewers. We did a mix on each skewer but many people like to do all meat and all vegetables, especially if there are any vegetarians around.

Place on the grill and cook for about 10 minutes, or as long as it takes for the vegetables to brown and the meat to be cooked through. Since it was a rainy day and we were grilling indoors. He made a creative contraption to allow our kebabs to cook off of the pan. You can also place the kebabs directly on the oven rack. We just didn't feel like having to clean the oven rack after :)
You can throw away the extra marinade or cook it in the oven or on the stove. We added extra onions to it and let it cook for about 15 minutes along with the kebabs. It was delicious and we ate it up with our kebabs and bread. It would also be very good served over rice.

The contraption had a little accident while cooking but everything turned out great anyways :) 


Enjoy outdoors on a sunny day or inside when you wish the weather was nice enough for grilling!

Wednesday, April 25, 2012

Baked (or BBQ) Feta Cheese (φέτα, beyaz Peynir)


This baked feta cheese is best made on a grill but we were tired of the rainy weather and decided to have our own BBQ indoors using the oven. Serve with bread as a side or use it as a main course for a vegetarian who wants to BBQ without the hamburgers and sausages.


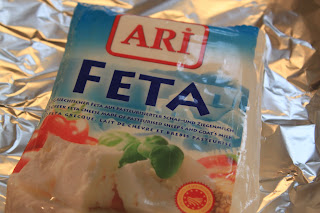
Although a bit time consuming because of cooking time, this baked feta is very easy to make. All you need is a block of feta and some herbs. We used oregano, basil, garlic, rosemary, pepper, sweet paprika, and a little bit of seasoned salt.


Place the feta cheese (leave whole) on a good size piece of aluminum foil. Season generously.


Fold the aluminum foil to make a pouch for the cheese.


Place on the grill and let cook for 40 minutes or longer (cheese should be very very soft). If you are making this indoors, place in the oven at 200 C (about 400 F) for at least one hour. We have never been able to make our cheese turn out as good and soft in the oven but it is still very tasty.


Serve with a warmed and sliced baguette.


Monday, April 23, 2012

Mix-Up Monday: Kehrwoche

Schwäbisch region (Wikipedia)

We have put it off long enough. It is time to talk about the lovely German Schwäbisch Kehrwoche. We explained a long time ago (back in our potato salad entry) about the Schwäbisch region of Germany we live in. This region is well known for various things...both good and bad. It is the area of many famous brands such as Mercedes and a lot of delicious food (e.g., Käsespätzle, Fleischküchle). It is also known for a strong German dialect (Schwäbisch) that makes understanding the locals always an experience for both non-native German speakers (like her) or Germans from other areas of the country. Swabia is also known for the dreaded Kehrwoche.


There is no one good translation of Kehrwoche. You will not find the word in a typical dictionary or even in most online translation programs. Even the beloved Wikipedia does not have an entry for Kehrwoche in English. What we can tell you is that it basically means chore week.

In this area of Germany, many people live in apartments that are more like multi-family houses and not apartment complexes that are common in large cities and in the USA. For this reason there is no building caretaker or manager to keep the common areas of the house clean and cared for. The Schwäbisch solved this problem through the development of the Kehrwoche.

A typical Kehrwoche sign (marin-gebaeudereinigung.de)


Each week a sign is hung in front of one of the apartments announcing that it is that apartment's turn to do Kehrwoche. This means various things depending on where you live. For the most part it means sweeping outside and inside the halls one time during the week. This sign then sits in front of the door until it is passed along to the next apartment when the week (or two weeks) has passed.

The sign also seems to have the task to constantly remind you when you pass, that it is your week to be the cleaning slave. There is nothing like the fear that the evil neighbors will get you and you should not forget... they are waiting with their brooms behind the door to hear the sound of cleaning.


To someone who has not grown up in this culture the idea of Kehrwoche is crazy. It even is nonsense to him (even though he grew up in a Schwäbisch area of Germany) because he did not live in an apartment growing up. We can imagine what many of you are thinking right now. That doesn't sound too bad. No need to pay fees for a building manager or maintenance guy? Sounds good! Only have to sweep a bit every few weeks...Seems reasonable to me...

Do not let the idea fool you! (and we apologize to anyone who loves their Kehrwoche :) ) It is not so simple! We have heard hundreds of stories (and experienced!) about the troubles of the Kehrwoche. Sweep this way, don't sweep that way. Do it on Sunday not on Saturday. Scrub harder! Use a toothbrush to get every crack clean! There seems to always be that one old lady that becomes the queen of Kehrwoche and takes it upon herself to make sure the building is run to the proper standards.

So doesn't sound so great anymore? We know what you now are thinking. Who needs Kehrwoche? Can't a whole bunch of adults clean up after their own mess and know when the hall needs to be swept? The answer is no...or at least no one has been willing to give it a try in this area. So Kehrwoche will continue to stand. No outsider has a chance on breaking the long tradition of Kehrwoche torture. The only way you will be able to escape is to hire some experienced personnel like him (He says that they have developed a 4 step efficiency system to get the best possible results - they train their personnel on your premisses to ensure the most efficient cleaning result of the Kehrwoche). We can't even make this stuff up ;)

Come for a visit. We will give you the true German experience and even let you sweep this upcoming Kehrwoche :)


Sunday, April 22, 2012

Spicy Scrambled Eggs (Habanero-Chili-Rühreier)


This recipe came from his former lecturer Javier Salas, CEO of web agency "anders und sehr". It fits our love of spice and her need for American-type breakfasts with scrambled eggs. If you are not a big fan of spice, we recommend trying this recipe anyways...just leave out or reduce the chili. [Even if some might call you a sissy then :o)]


For two servings:
1 green onion, chopped in rings
2 EL (Tbs) olive oil
50 ml milk
1 habanero chili (if you don't like spice then stay away but we don't think the recipe would be quite the same without it)
4 eggs
200 grams of cherry tomatoes
200 grams of any type of strong and spicy grated cheese
Parsley
salt and pepper
Baguette (we used rolls, any bread you like works)

Habanero


Before you start. Cut the green onion into small rings, cut the tomatoes (about 5mm slices),  mix the eggs, milk, a dash of salt and pepper together, and cut the chili into thin strips. 


Habanero cut in half
We have heard that some habanero chilies are so spicy that they should not contact skin. If you are worried, you can use gloves. We cut our chili in half and then removed the seeds so it would be a *little* less spicy.  


Preheat the oven to 200 C (almost 400 F).  At the same time, heat the olive oil in a pan on the stove. Add the onions and let cook until they get a glassy look. Add the habanero strips and cook for another minute. 


Add the egg and milk mixture to the pan. Stir and let cook until it begins to stay together. It does not have to be fully cooked because it will go into the oven. It should stay together but having a bit of a wet look is okay. 


Remove the pan from the heat and cover with the tomato pieces and cheese over the tomatoes. We do not have a pan that works on the stove and in the oven so we had to transfer the eggs to an over-safe dish.  The eggs should not be spread too thin. 


Cook for about ten minutes or until the cheese is nice and melted and beginning to brown.


Serve with parsley and bread. 
Extra hot sauce to add to the spiciness :)


Friday, April 20, 2012

Stove Top Pork Chops with Tomatoes and Onions


We don't really have a good name for this recipe because it is for the most part made up. We found a similar recipe which called for spicy sausage and pork, but that was just too much meat for us. We made some adjustments and this is what we got...


For two servings:

2 pork chops
1-2 Tbs olive oil
1 onion, chopped
2 garlic cloves, chopped
1/2 cup dry white wine
500 g pizza tomatoes (diced tomatoes with sauce)
1 bay leaf
2 Tbs parsley (fresh is best)
salt and pepper


Start by heating the olive oil in a large frying pan. Once the oil is hot, add the pork chops and cook on high until they have a nice brown on both sides. They will be cooked again so do not worry about them being cooked all the way through.


Once browned, remove the pork chops from the pan and set aside. Then add the onions and garlic to the pan. Cook until the onions become glassy.


Add the pork chops back into the pan. Add the wine, tomatoes, bay leaf, parsley, and a few dashes of salt and pepper.


Cover and reduce the heat. Cook for 30 minutes letting it simmer.


Serve alone or over rice of noodles. We had ours with noodles and next time we plan on reducing the cooking time a bit so there is more liquid left to use as sauce.


Wednesday, April 18, 2012

Candied Carrot Curls

This is a recipe for candied carrot curls to top carrot cake. Our carrot cake recipe is  here

She was looking for a cute carrot cake topper last week for some birthday cupcakes. Unfortunately, all of her cake/cupcake decorating supplies are back in the USA. Using a one euro tip kit (with the help of her handy dandy assistant cutting off the tops and reshaping the tip to be wider and better for cupcakes) she came up with a pretty cute and easy solution. Originally, she was going to make little carrots, one of the easiest designs in the cupcake design kingdom. However, with no green food coloring (for the carrot tops) and none sold at the only store nearby, she gave up and went for something different. Using the idea of carrots as garnish for regular meals, she found many recipes online with suggestions on how to turn a boring carrot into a candied treat for any cake or cupcake.

For an entire batch of cupcakes:
1 carrot (larger is better)
1 cup sugar
1 cup water


Peel the carrot until the entire outside layer is gone. Then start on one side and peel the carrot down until it becomes flat and the pieces coming off are quite large.


We think more is always better (and leaves room for mistakes) so kept going until the bottom ending up with about 20 peels.


Boil the water in a small saucepan. Add the sugar and stir until dissolved. Add the carrot peels. Let boil for 15 minutes (uncovered).

During this time, preheat the oven to 100 C (210 F).


Once 15 minutes is up, drain the carrots. You do not need the sugar water so just throw it away.


Lay the carrots out on a tray or cookie sheet. Make sure to use parchment paper on the tray. The pieces should not overlap.


Bake for 30 minutes. During this time we recommend you make sure you cleaned your sieve or strainer. If the sugar dries it will be horrible to clean!


Remove the carrots after 30 minutes but leave the oven on. Using a wooden spoon, wrap each carrot around the handle and slide it off the end. Place the curls back onto the tray.


Cook for another 45 minutes or until dry. If you live in a higher altitude the cooking times will be much less!

Once your carrots are finished you can use them right away or store them in an air tight container. Do not leave them on cupcakes overnight because they will become soggy. She left them in a container for three days before using and noticed that they lost a lot of their crunch. For this reason, next time she would make them the day they are needed.

We used these to show that they were nut free


We topped those with nuts inside with extra nuts
Also, she was surprised at how big the curls were (most were too big to look very nice on a cupcake). Next time she would cut the peels in half both width and lengthwise. She thought she would be able to after they were dry but by then they were too brittle.


Monday, April 16, 2012

Mix-Up Monday: Commands

Nothing like a mixed-culture relationship to bring out how stereotypical you are for your culture. We have really noticed this lately when it comes to commands, or telling people what to do.

She is much more American about it than she ever realized. First he ignored it (aka, didn't notice it (she thinks^^), then he tried to figure it out, and now he is just more confused then ever. Whenever she wants something done...anything, she very often phrases it as a question/suggestion. In the last day alone she has asked him, "Do you think the dishes need to be washed? " "Should you get a plate now?" "Does this need more salt?" The list goes on and on and on (he wants to add that it goes on and on and on past that too!) At first he did not really notice it because to him a question was a question and he did not always need to answer. Now he very often asks her a question back: She: Does it need more Salt? - He: Do you think it needs more Salt?  Then she started to repeat what she wanted over and over and he got that it must mean do it, not think about it! She never even noticed that she did it until he started to point it out. He says that the questions aren't questions, they are just commands formed to sound like nice suggestions and they drive him crazy! The other night she asked, "Do you think we need to take out the trash?" and he took it out because he assumed it was another one of those question-commands. She swears it really wasn't, she was just asking! (he adds: blablabla)

German style (e.g., him) is about as opposite as it gets. He isn't rude but if he wants her to do something he says it. "Give me the salt, please." "Can you get the remote?" She says that he isn't always being very nice about it, he says he is being clear. She says that she is always nice about it, he says she just confuses him.

The difference can even be seen in the two languages. In English, commands are written as normal sentences except for the sentence order is changed. "Go do your homework." In German, commands are always written with an exclamation point, "Go do your homework!" Giving the appearance (at least to an American) that commands are being angrily yelled.

Now that we know we do it, it isn't a big deal. The misunderstandings give us a good laugh. Besides, she isn't complaining...sometimes he gets so confused he takes out the trash, washes the dishes, and does the laundry :)

Saturday, April 14, 2012

Sweet and Sour Sauce in Four Ingredients


This sweet and sour sauce is as easy to make as they come. We don't think that it matches restaurant-quality sweet and sour sauce exactly, but for the speed and ease it is definitely worth making (and eating!).

All you need is:

1/2 cup lemon juice
1/2 cup ketchup
1/2 cup crushed pineapple (with the juice)
1/3 cup brown sugar


Make stir fry however you normally would. We were making stir fry to use up a lot of stuff we had in our fridge so we realize the pictures might not fit a normal stir fry that goes along with sweet and sour sauce. This time we included mushrooms, corn, sprouts, broccoli, bell pepper, carrot and onions. We didn't even add any meat but often we do and we think it does add an extra level of tasty.


While you cook the vegetables it is a good idea to also make rice. 


When you vegetables are almost done cooking, mix all four ingredients together in a bowl. Give it a good stir (to make sure the brown sugar does not get stuck to the bottom) and then pour it over your stir fry mix. Mix well and cook for about 2-5 minutes or until it thickens.


Serve over rice immediately.